
Thank you all so much for your kind comments on the
transformation of my dining room ceiling.
Here are the details on how it all went down...

Product:
Nailhead Strips - 40" - I used 44
Nailhead Tacks - each 40" strip uses 16 tacks - 704 each!
My tray ceiling is roughly 8' x 9' and I used a 22" x 21" octagon.
When estimating how much you'll need, there is no waste.
I purchased my material locally from:
Denver Fabrics
303.730.2777
(they do not have a website and are NOT the same as denverfabrics.com)
You can contact them to order materials.

Price:
Nailhead Strips - $1 each x 44 = $44.00
Nailhead Tacks - .03 each x 704 = $21.12
Total: $65.12
Procedure:
As I mentioned, I was inspired by Kara Paslay's bold pattern
and followed her tutorial by making an octagon pattern and transferring it to the ceiling.

Kara's pattern on her wall.
Using a pencil I lightly traced around my pattern on the ceiling.

I chose to center my pattern around the chandelier.
However, the chandelier isn't centered in the tray ceiling,
because of the placement of the windows and french doors it is aligned with them
resulting in my pattern being off a few inches.
I chose it have it off at one side rather than the pattern not being centered
around the chandelier....clear as mud?
Follow your pattern and start nailing....a tack is placed at very fifth nailhead.
I was able to push the tacks directly into the drywall in some areas.
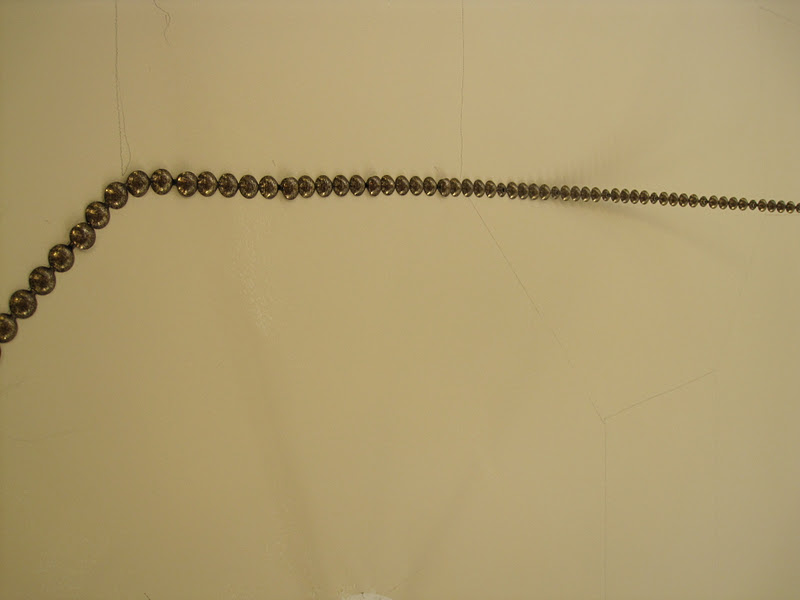
Keep nailing...the strips easily break apart when you get to the end of a line.
I measured mine by putting the strip up to the pattern and breaking off the amount needed.

Problems:
Sometimes your nails don't line up exactly as you hoped,
this is what I was aiming for.

But, sometimes this is how it aligned.

I removed the tacks and shifted the line over just a tad.

It would have been easier if I'd added the border before nailing all the way to the edge.
Oh no, I didn't remove them, just went around them!

After adding the border, I touched up the visible pencil lines and smudges with paint.

My number one tip...Patience!
Have fun, you can do it, too!


64 comments:
Oh my stars, oops I mean nailheads! You are going to be the talk of blogland! That is so awesome and I can't believe how affordable. You have my creative juices flowing as to how I can incorporate this into my home! Awesome job!
This is just AMAZING! I love the detail and effect! Nothing could have done this like nailhead and the minimal cost for such a large impact... priceless! or $65! Still cheap! Pinned it and love it!
Wow...it looks gorgeous! Love it!
First of all, just wow. Secondly, can't believe the price (so great) and your patience. Thirdly, while more time consuming, I do really love it with the border. Hats off to you and pour yourself a glass of wine (maybe later tonight)! Amazing, amazing work!
O thank goodness. I had no idea there was such a thing as "nailhead strips". I was imagining you on a scaffold a la Michelangelo nailing in each individual nail. Now I am really inspired. Again, gorgeous.
You're creativity is inspiring many others. So looking forward to stealing your idea! You rock!
Pam, I can't even express how impressed I am with this project. It is gorgeous! I just can't get over it! You must win the design patience award of the year! (Lots of !!! in this post, but I can't help it!)
So proud that you stuck it out and finished it. I'd love to feature your project on my blog next week if you don't mind.
That last photo of the reflection in the mirror is awesome! My one question - how are your shoulders, back, and arms after this project? I'm sore just looking at it - but definitely a labor of love. You're going to be the talk of the town once your friends see it!
oh my gosh, it turned out AMAZING Pam! You did such a great job! Would you be flattered if I copied you!?
You are a crazy lady and I want to be you!! I'm seriously in awe right now!!! I cannot believe you laid out the whole pattern (by yourself?) and put up all those tacks!!
Oh my gosh I'm in love. It's so unique and interesting - you've got to have a dinner party!!
Pam, I can't stop staring at your beautiful ceiling! I think the border sets it all off and was well worth it. Your photo belongs in a magazine. Hope you're taking a little break.
This is the most beautiful and creative project I've seen in blogland! Your patience is amazing!
Ditto everyone else! I'm searching for a spot that needs a little nail head trim...
Absolutely fabulous Pam! I am pinning this one, what a great way to dress up a ceiling or wall, love it!
Cathy
Un. Flipping. Believable. I am BEYOND impressed! I've worked with these strips before and they never lined up for me. Yours is PERFECT!!!! totally fabulous!
Stacy
OMG Pam this turned out gorgeous!! LOVE LOVE the way it looks!
It looks gorgeous!! What a great job.
Kathy
This is amazing! Your patience is commendable and your efforts are award worthy! Love it!
Wow. What an amazing and creative idea--and a gorgeous ceiling too!
Amy
www.11magnolialane.com
Oh Wow! I have to go back and look at what I have missed. I have always thought about doing something with the ceiling..this is amazing..you must have given yourself some back and neck pain but so worth it, Pam. Well done..you must be thrilled!
Love the beautiful detailing! :)
Came here from Kara Paisley...I loved her project and I love, love yours. I also know how physical working on a ceiling can be. Just painting mine kills my arms. I really thought those tack strips would be expensive...surprise. I love big projects...rather than crafts ... although I do those too...but this kind of stuff is me. I've been looking for blogs that share my style so I am now following yours. I'm new...and older...so finding my niche has been a challenge. Can't wait to read all your archives. By the way....I like your: The Problems part. Every project has some and it is so helpful to let everyone know what to look out for. Super super job.
becky@reinventingtheordinary.com
That is so so cool! came over from kara Paisley designs after they featured this. Way to go - you deserve some recognition!
This looks amazing - great DIY. Love it. How is your neck feeling :) Pinned and tweeted this - just awesome!
My Best - Diane
amazingly creative and amazingly beautiful!
This is beyond words, I don't know what to say, simply amazing! Are you arms and neck ok? I can't even imagine!!! Can I share this on my blog? I like to share ideas that are out of the box and give kudos to those who think outside of the box, it's called my Ms Smartie Pants award. Just wonderful!
ok that is nothing short of stunning and completely creative and you must just keep catching glimpses of it and be thinking to yourself "damn I'm good"- which you should be, cuz holy crap woman, you're amazing...
Wow! I saw your new ceiling design over at Kara Paslay and it is incredible. What a tremendous idea... love, love, love!
you were right about the border. it really finishes things off. hope your arms and shoulders recover from the workout soon. like they say on toddlers & tiaras, "if pretty was easy, everybody would do it."
Simply amazing! I can't imagine the work you put into this. Looks fabulous!
Yep! You get the award! I love it...and I will admire yours.....cuz there is NO WAY I would even try it!!
Wow, that is ah maz zing! Are your arms tired? This is truly a work of art! Congrats! - Lori
That is SO cool! I love the photo you took of the reflection in the mirror. What a creative idea. :)
Most amazing DIY idea I've seen a quite awhile!! This is fabulous, enjoy it! Janell
I can only imagine that you must have felt every muscle in your arms, neck and back for days after that--like painting 100 ceilings! Truly spectacular (and ambitious)!
See! This is why I wish my ceilings were smooth! Love it!
This is out of this world fantastic!!! How did your neck survive? I stenciled a bathroom ceiling and it was killing my neck!
Great job, thanks for sharing it!
Nancy
http://www.powellbrower.com/2012/02/new-artist-love.html
Fantastic work! Very clever and creative. Well done!
Absolutely my newest favorite DIY! This is stunning! Such a unique, creative way to up the WOW factor in a room.... I can't imagine anything more unique. Thank you for the inspiration and for sharing!
Warmest Regards,
Whitley Adkins Hamlin
www.thequeencitystyle.com
Your ceiling looks absolutely Fabulous!!!
Talking about patience, If you like lamp shade made of feathers here is my project
Have a lovely day, xo
http://sonia-daigle.blogspot.com/2012/02/diy-feather-lamp-shade.html
Stunning! It looks like a detail you would find in one of the multi million dollar homes in an architectural magazine. Love it!
rachel
Genius! It looks amazing. Great tutorial, too.
Visiting from Centsational Girl. Following you now. :)
SO incredible and beautiful. It must have taken amazing patience. Awesome job, and thanks for sharing how you did it!
Ooooooh, just saw you on Tip Junkie!!! Way to go!
WOW, is that crazy! I thought it was paint...I love nailheads! Who would've ever thought to do this? What a fabulous idea! And I would say you need a TON of patience.
There are hardly words for this - it's just so phenomenal!! I would really love it if you'd share this over at the Trash 2 Treasure Tuesday party on Kammy's Korner: http://kammyskorner.blogspot.com/2012/02/trash-2-treasure-tuesday-21.html
This is AMAZING!!! I'm cringing thinking of the pain in my neck from working on the ceiling for a gazillion hours. Not sure I could pull this off! But LOVE IT!!
WOW! After seeing this I'm totally following you. I found you through remodelaholic looking at kids rooms and a great teen room it is but this, just wow. I'm impressed:)
Regina
Just found this on Pinterest, and am in love with your ceiling! What a fantastic idea!
I'm your newest follower by the way :)
Ashli @ http://thegrayhouseontheleft.blogspot.com
That is amazing!!!! I'm very impressed. I am featuring this at somedaycrafts.blogspot.com
I just wanted to pop on over and tell you that this is a WICKED idea. Awesome job! Keep it up!
Incredibly clever and great example of how to use something in an unexpected way - I never knew those strips existed! Would love for you to link this (or any other ideas) to my weekly Craftastic party. Love it!!
What a cool place to use nailheads! I have them on my bed and have always intended to use them in a DIY project, but haven't been especially inspired. Love the ceiling treatment!
Just saw this ~ simply stunning! I don't know how your neck held out but it looks fabulous. :)
xo
Pat
How did I miss this? Wowza I love the finished effect! This is genius - Pam you are the Woman...I have to find a place where I can try this...powder room??
Royal ceilings and walls Perth provides wide range of Gyprock interior Shop Fit Outs, Commercial Building Fit Outs, and Office Partitioning. Whatever you requires we can do! We also specialize in shop fit outs and office partitions.
Ceilings Repair Perth
When you are considering for taking the help of a flooring contractor to get the new floors of your house or office, you ought to confine mind the aim of your need.
Portland drywall
Always take some professional help when doing something big otherwise it gonna cost you a lot.
Patch King Drywall
Do you need an urgent loan of any kind? Loans to liquidate debts or need to loan to improve your business have you been rejected by any other banks and financial institutions? Do you need a loan or a mortgage? This is the place to look, we are here to solve all your financial problems. We borrow money for the public. Need financial help with a bad credit in need of money. To pay for a commercial investment at a reasonable rate of 3%, let me use this method to inform you that we are providing reliable and helpful assistance and we will be ready to lend you. Contact us today by email: daveloganloanfirm@gmail.com Call/Text: +1(501)800-0690 And whatsapp: +1 (501) 214‑1395
NEED A LOAN?
Ask Me.
The importance of your roof cannot be overstated as it shields your house from diverse weather elements. To facilitate your search for top-notch roof repair services in Calgary, here are our top five picks.Visit joincalgary Now
What a fantastic DIY post, thanks for sharing! The step-by-step guide you've provided for creating a nailhead ceiling is incredibly detailed and helpful. It's amazing how such a relatively simple project can completely transform the look and feel of a room. I couldn't help but think about how DIY projects like these often require a bit of upfront investment in materials. Sometimes, you might need a quick financial boost to kickstart your home improvement plans. That's where options like a 500 dollar loan from PayDaySay can come in handy. So, for anyone looking to embark on creative home improvement ventures like this nailhead ceiling, it's reassuring to know that there are financial solutions out there to support your projects. Your blog post serves as a fantastic source of inspiration, and now, with a little financial help if needed, there's no limit to what one can accomplish in home decor. Keep up the great work! 💡🛠️
Beautiful work—your nailhead ceiling tutorial is inspiring, and those perfectly aligned nails really elevate the space. For anyone in Alpharetta tackling drywall repair in Alpharetta, finishing touches like this can take your ceilings from functional to fabulous. Thanks for sharing!
If you’re searching forAffordable Drywall Repair Services this is a great resource. Professional teams provide reliable patching, crack repair, and finishing without breaking your budget. Whether it’s minor fixes or larger wall restorations, affordable solutions ensure quality results and smooth surfaces that enhance your home’s look and value.
Informative and practical! I also found a valuable post about estimating drywall jobs.
Post a Comment
When you leave a comment whether simple or detailed, it brightens my day!