
Yay, it's off the list!
I'm loving it with my neutrals and am so happy I went with the lighter color.
I have a bit of detailing to do on the bottom hardware.
(Oh my gosh, I JUST now noticed I didn't do the hardware on the doors!)
Yep, went and confirmed, thought maybe it was the photo...ugh...
can't believe I missed those guys!
Anyway, here it is and I can't wait to give it a little Christmas pizazz and show
it to you next week along with my unconventional Christmas tree....
there's a peek for you off to the side. :)

Products:
Annie Sloan Chalk Paint - French Linen
Annie Sloan Clear Wax
Rub 'n Buff Gold Leaf on Hardware (most of it!)
Aluminum Sheet on doors - Home Depot here
Thank you Linda and Jennifer for suggesting the metal, Cathy for suggesting greige
which led me to French Linen, and my kind reader that advised against black,
and, to all of you that offered your opinions along the way and tips for working with ASCP!
Price:
My hutch was a Craigslist purchase, it included a table and six chairs - $250.
Paint and Wax - $70
Aluminum Sheet on Doors - $32
Plastic that didn't work on doors - $16
(I'm trying to think of a clever diy to salvage it)
Prep:
None, that is the beauty of Annie Sloan Chalk Paint, no sanding or priming.
I wish I would have watched this video by Cindy @ Simply Reinvented here
before waxing, she has great tips I'll be using next time!
Problems:
I didn't purchase one of the waxing brushes ($35). I wasn't sure that I'd be doing enough
pieces to warrant it, but it would have made the waxing much easier.
I know I used a lot more wax than I should have, but didn't realize it until too
late in the game. I did have to add some water to the paint as it thickened a bit
from having the lid off for so long while I was painting.
Otherwise, easy to use and great coverage, I applied two coats of paint.
Before:

After:
See you Monday, I'm off to finish decorating and get my act together for the
Favorite Things party,
that I've totally neglected because I was obsessed with finishing this!
Happy weekend, hope you get something BIG crossed off your list,
or have some BIG fun!
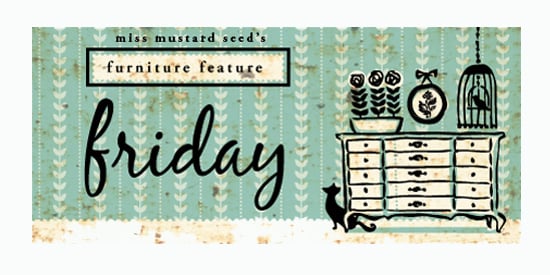
Stop by Miss Mustard Seed's Funtiure Feature Friday here for lots of inspiration!


42 comments:
Love it! That color is perfect! I love the touches of gold too, it's so pretty.
Well, you certainly worked your magic on that piece! The before and after is amazing. Even with no styling it's absolutely gorgeous! So glad the metal sheets worked out-they look just right. This is such a classic piece that I know you will love. Wish I could find one too! Have a great weekend, Pam!
My favorite transformation of yours thus far! Spectacular!
That is a really impressive transformation. I am not always a big fan of painted furniture, but in this instance I think it vastly improves the piece. I also like the way you changed the position of the doors, and the colour is perfect.
Gorgeous! Now that is a great Before and After, you are going to have so much fun filling it!
This is fantastic. You really did an amazing job. I would not have seen the potential in that "before". Have fun at your party. I have a BIG (in size) CL piece to pick up on Sunday....I hope.
Tremendous difference! That combo of grey and gold has become one of my favorites :)
AS anticipated, the piece is fabulous Pam!!! I LOVE the color you chose and all of the details, can't wait to see it styled up for your party! Have fun prepping and enjoy your week-end!
It's perfect!
Oh Pam!!!!
It's just lovely - as beautiful as I envisioned. The gold mesh is perfection!! And I LOVE the gold with the grey - so pretty together. This has turned out to be a fabulous bonus piece to your table and chairs hasn't it? Wow - that was an awesome Craigslist find!!!!
Thank you for sharing - I am so inspired by this makeover!!
Pam, this looks like an expensive Swedish antique! You really outdid yourself and I can't wait to see how you dress it up!
Pam that looks FABULOUS!!
Wow! What an improvement. Looks great. Wow!
I really like the way it turned it--you would never think one came from the other--an AWESOME upcycle there!
Also, don't forget to enter my giveaway going on now! :)
I love this! Great color choices.
WOW. take my breath away it is a total beauty!
Love it Pam! You did an amazing job!
Oh, girl, that turned out great! Well worth the elbow grease involved.
Pam, it's GORGEOUS!!!! Love the gold !!!
We're working on the kitchen ...
Amazing!! Loved how you repositioned the doors it made the hutch look larger.
It is just beautiful, Pam. The color is perfect and I love the gold hardware. Another amazing transformation!
Stunning!
It's gorgeous! Love the color and cannot wait to see it with accessories. I also look forward to see what your doing for your Christmas decorating!
It looks so fantastic, Pam! The color is just perfect and I love the gold details. Enjoy your weekend :)
Oh my stars!! That is absolutely stunning. All of your hard work has certainly paid off and now you will have a piece to treasure for a long time. I can't wait to see how you decorate it for the holiday!
What an awesome job you did here...it looks outstanding!!!
Blessings,
Linda
So cool you renovated it!!! Looks so pretty ;)
I love it Pam! It looks just like you! Great job. And that tutorial was a good one. I still don't agree with waxing before sanding but the way to apply the wax is great!
WOW PAM, this is amazing! Doesn't even look like the same piece, just beatuiful! I love the color :) Hope you have a great weekend.
XO
Kristin
Magnificent Pam....It is a stunning piece and you made it more beautiful!
Wow, I can scarcely believe that it is the same piece. You did a great job. I can't wait to see the Christmas tree & the "favorite things".
Warmly, Michelle
It does not even look like the same piece! I am now anxiously awaiting the styling of this beauty!!!
Pam, it is magnificent and the hours you put into that really show! I love the piece, and you just tripled the price tag at the very least! It is beautiful.
xo Nancy
Powellbrowerhome.com
Wow! This came out fantastic. I LOVE it! You did such a wonderful job and I love all the gold detailing and the metal you put in. It is beautiful.
Amazing.
Thank you for posting the link to the tutorial! A new reader mentioned they found my site through yours. LOVE how you moved the doors to expose shelving in the middle. Looks much more updated and on trend.
looks gorgeous, pam.
hope you'll stop over soon--we'd love to have you.
michele
Love this! Where did you get the aluminum sheet?
Thanks, Casey! I got them at Home Depot, there is a link to it above in the products I used.
I would love to find my own china cabinet like this one. Does it have a manufacturer's name stamped on it? Also, what style would you call this?
Not sure if you're still responding on this blog. Would like to ask how you got your cabinet doors to close after painting them? I just put on two layers of a great primer and one layer of satin latex paint. All the doors are having trouble. Did not paint tops & bottoms but paint goes beyond the edges since the cabinet was brown wood and is now a soft white. Any suggestions? Thank you!
LOVE your stuff!!
Hi Sea Maiden - Wow, I've never had trouble with doors closing on anything I've painted. The only thing I can think of is to maybe sand it down a bit. I'm sorry I can't be more helpful, I did a quick Google search and there were some suggestions, so you might try that. Good luck!
Post a Comment
When you leave a comment whether simple or detailed, it brightens my day!